Lesson 7: Intervals (Part 2) - How to Play
Intervals On The Guitar
Lesson Contents:
- How to Play Intervals on the Guitar
- 21 Diagrams (100 fingerings) for Intervals Less Than or Equal to an Octave
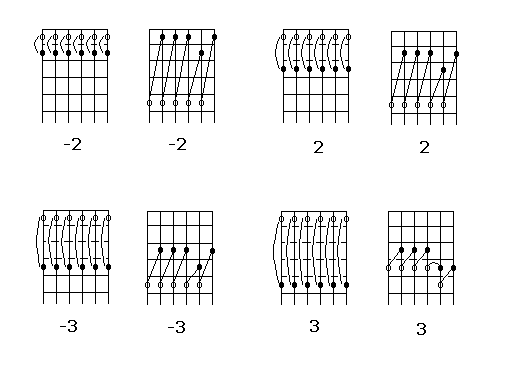
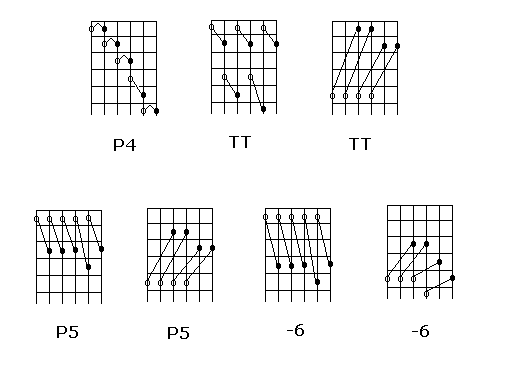
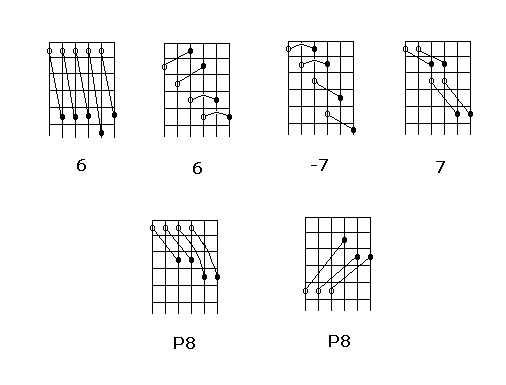
What follows are some digital representations of some drawings I drew by hand a while ago.
These will help you learn how to play intervals on the guitar. An open circle represents
the starting or lower note for an interval while a filled-in circle represents the ending
or higher note. I draw lines to connect notes. Play these intervals in two ways - one note
at a time (melodically) and two notes at the same time (harmonically.)
Of course, there are other ways to play intervals on the guitar using open strings and
tricks like that, but I just want you to see all of the practical patterns (fingerings)
using only closed or fretted strings. Also, be aware that all of these intervals are
less than or equal to an octave in distance. I show only these intervals because they
are easy to grab (for the most part) and are well suited to the guitar's tuning.
Study this material well. It should be second nature to you. Try to integrate these
elements into your playing as much as possible. The advanced lesson called
"Palette - 3 Note Motifs"
should help you achieve this goal if you haven't any idea how to start. In fact, "3 Note
Motifs" was the impetus for this lesson (and these drawings.) Enjoy.


Proceed to Lesson 8 or go back to the
main menu.


